Managing Booth Types
Exhibit booths can be created in two ways:
- Using a .dwg (or "drawing") file: This file type is used to create a multi-layered floorplan in programs like AutoCAD. A floorplan .dwg file can often be obtained from the venue at which the exhibition is taking place. By importing a .dwg file, the system can automatically create booths and booth spaces.
- Manually: In instances where a floorplan is undesirable or no .dwg file is available, staff can manually create each booth. Booth spaces are still used for ease of assigning parameters common to groups of booths of the same type.
Accessing Booths
Booths are grouped under halls. To view the booths in a hall:
- Navigate to the Exhibits App > Exhibits feature.
- In the list of exhibits, locate the Exhibit Record and click View.
- In the Exhibit Record, select the Planning tab > Halls menu option.
Halls with an Uploaded .DWG
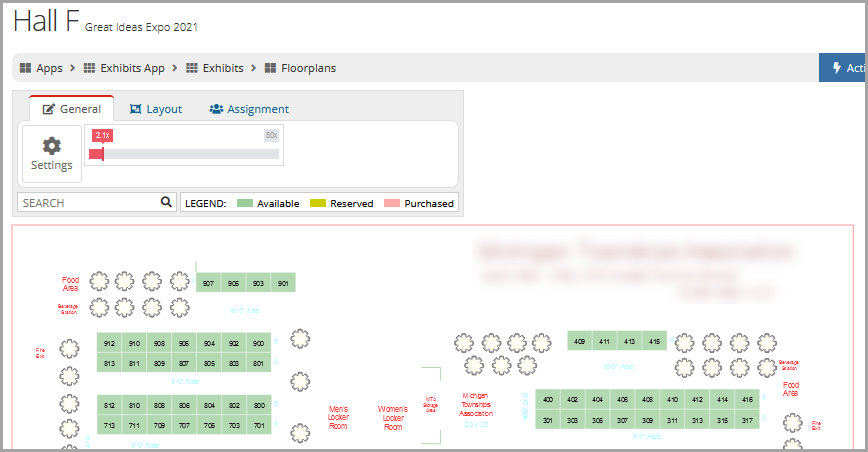
If a .dwg file was imported for a hall, the Floorplan button next to the hall is blue.

Click the Floorplan button. A floorplan, such as the one pictured below, will appear.
Tip: For information on uploading a .dwg file, see: Preparing & Uploading a .DWG File.
Halls with Manually Created Booths
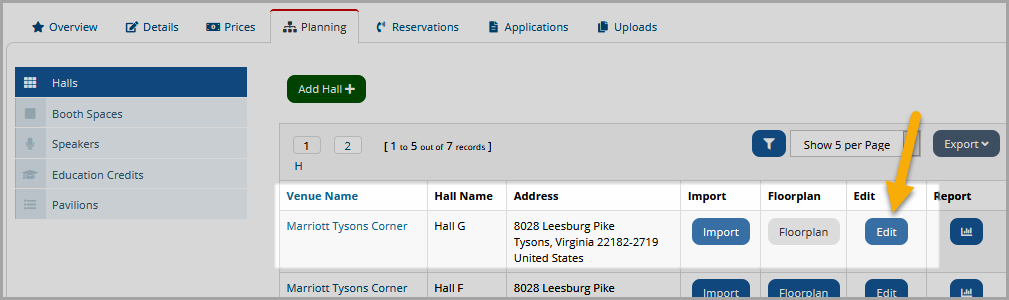
Manually created booths for a hall are accessible by locating the desired hall in the Halls list and by clicking the Edit button.
The Edit Hall page will appear.
Scroll to the bottom of the Edit Hall page. All manually created booths for that hall are listed in this area.
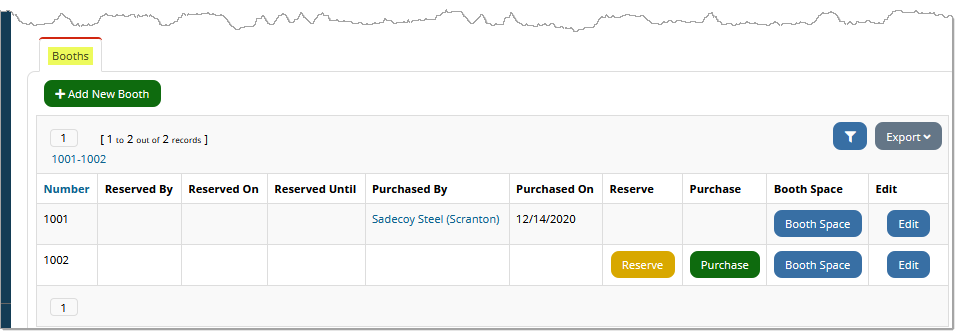
To manage a booth that has already been purchased, click the Edit button next to that booth.
Tip: For information on manually creating booths, see: Manually Creating Booths.